How To Take Quality Product Photos for Your Business
Product photography is essential for any eCommerce business, but not all entrepreneurs can afford professional product photography right away. That is why we have compiled a step-by-step guide on how to take a quality product shot for your business.

1. Choose your background.
Whether you go with a solid-colored seamless backdrop or a more styled setup, consistency is key. Choose a background that would compliment all of your product offerings. This is why many businesses choose a safe option like a white infinity background. To replicate the white infinity background setup at home, simply tape a piece of white paper to the wall and drape it over a table surface, like the above. Make sure that the paper is wide enough to accommodate at least three of your subjects side by side.


2. Choose your light source.
If you prefer natural light, shoot by a window. Unless you are going for a high-contrast look, diffuse your light source by filtering it through a white translucent material like a curtain or shooting on a cloudy day. Alternatively, if you prefer strobe lighting, either shoot through an umbrella or use a light modifier like a soft box. We use Profoto D1 Air 500Ws monolights with a 3' Profoto RFi Octa Softbox, but a more budget-friendly option is the Interfit S1N AC/DC HSS TTL monolight with a Interfit Foldable Octabox Softbox.

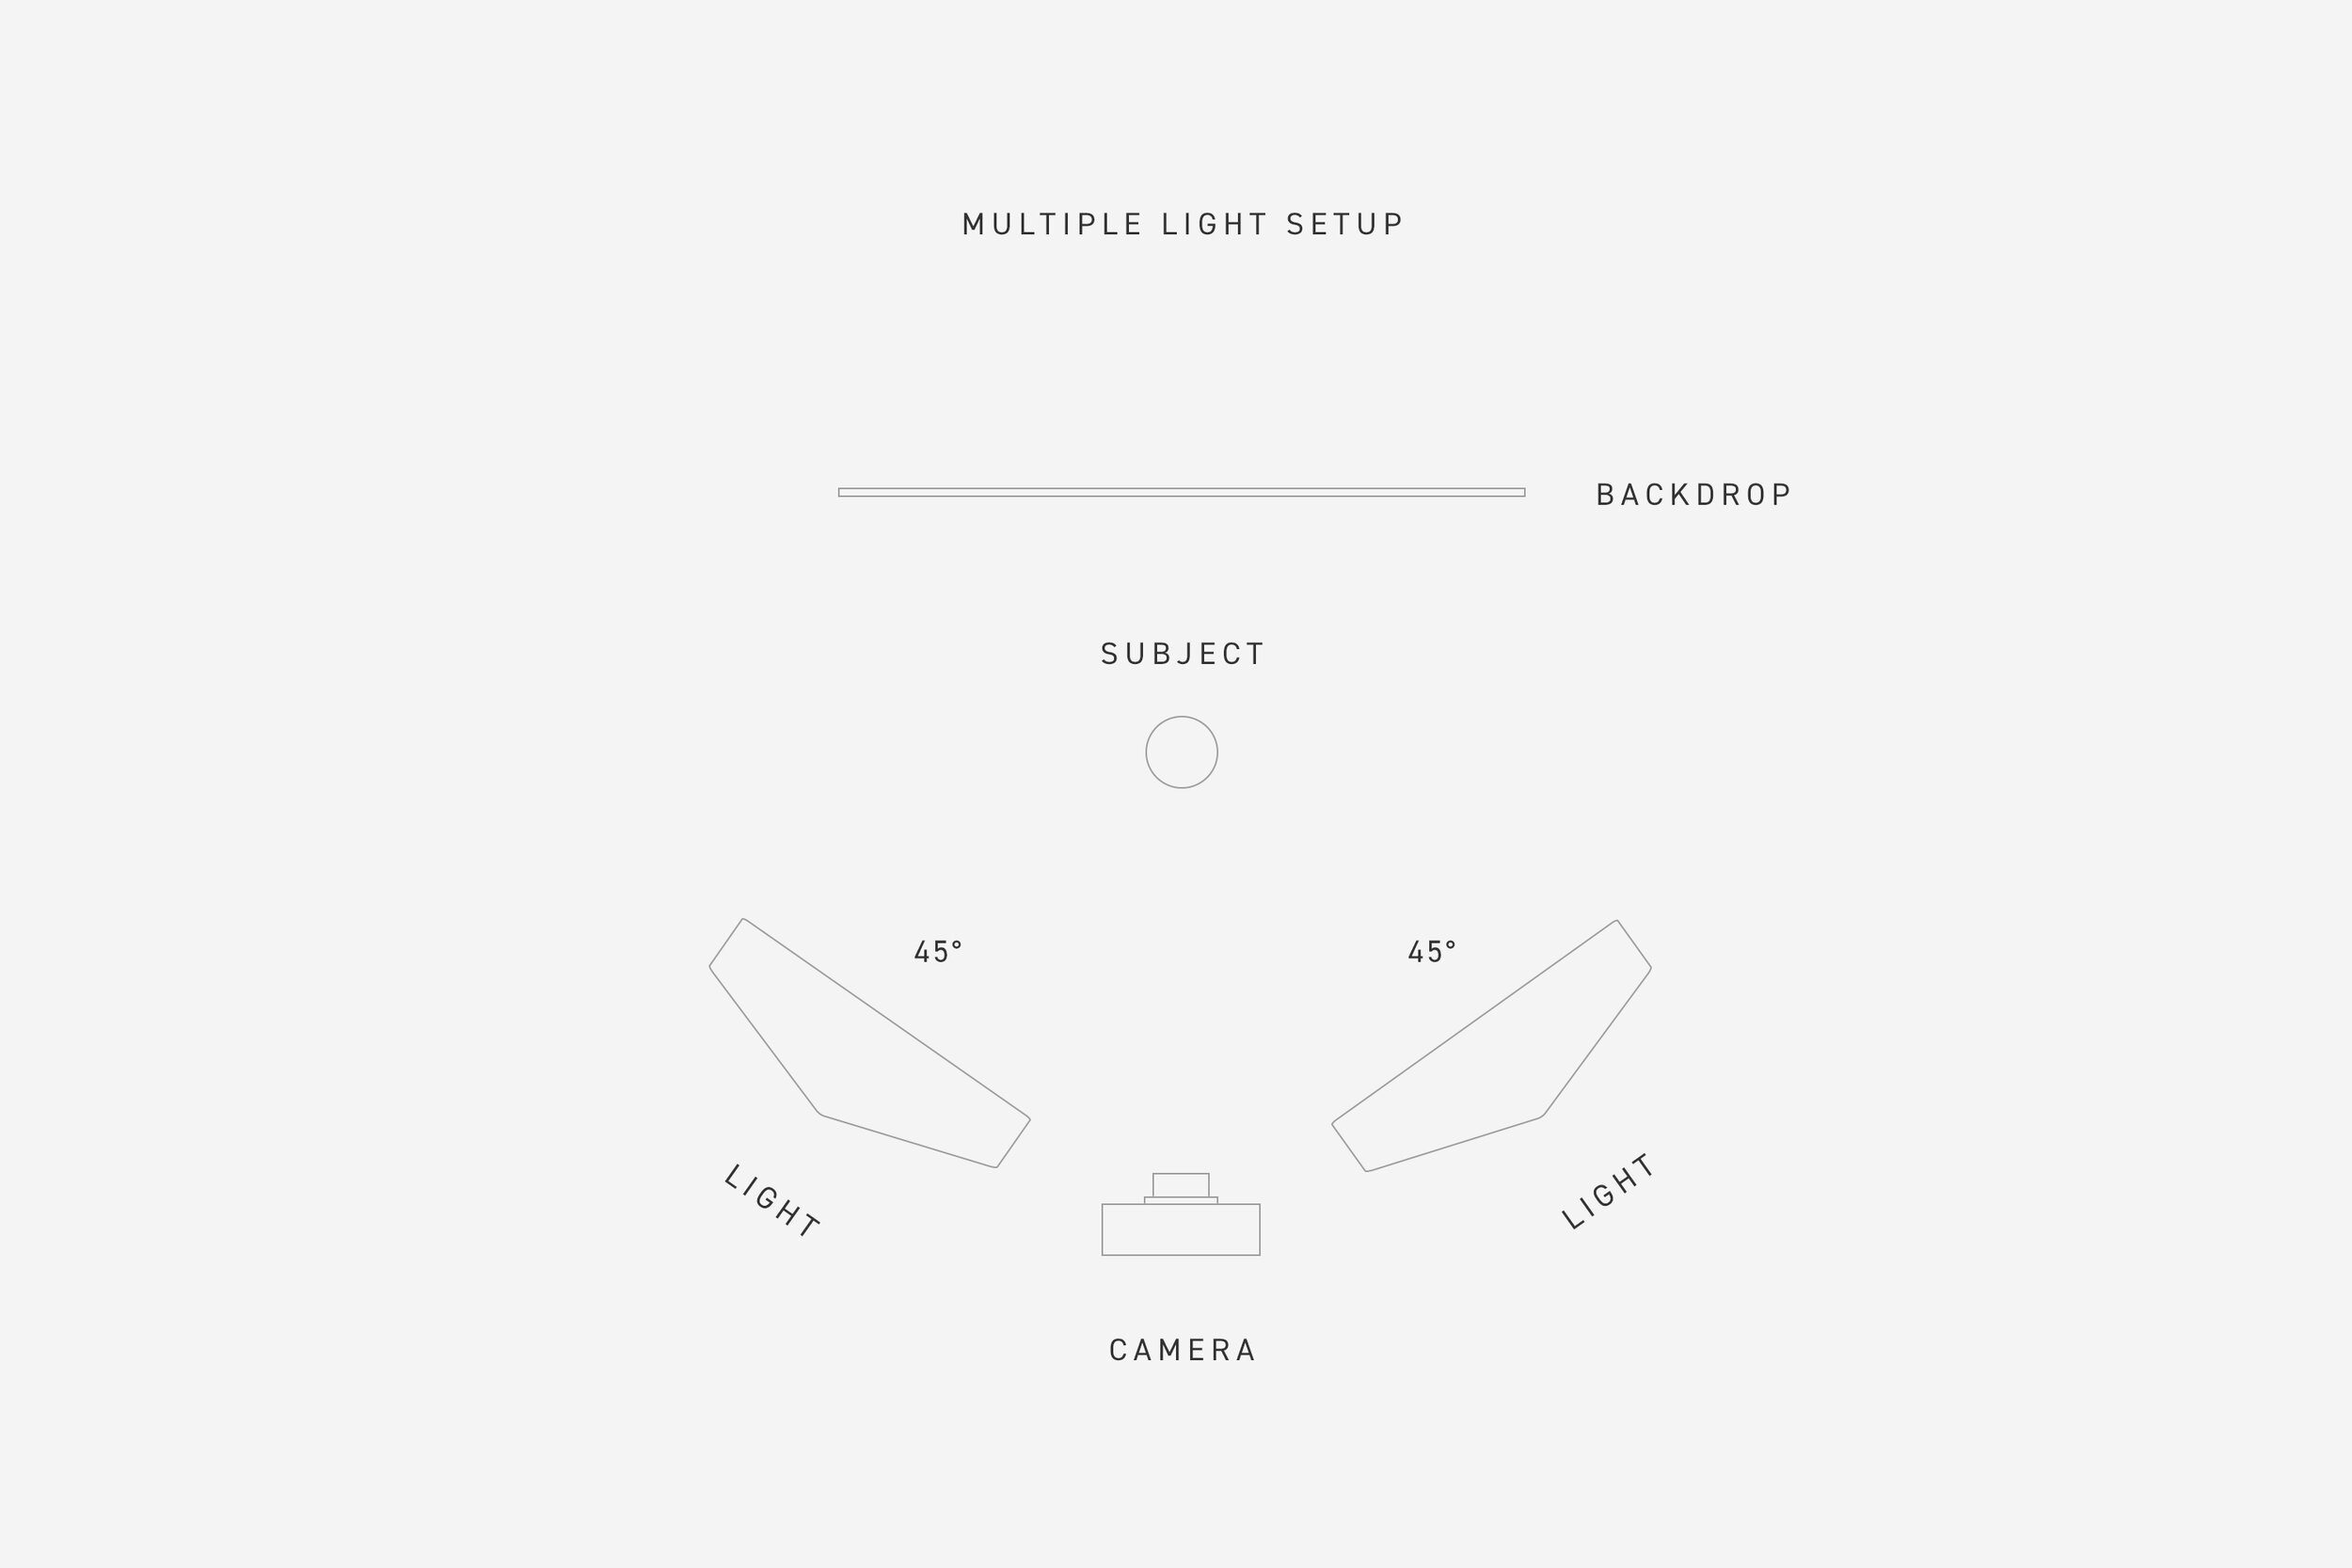
3. Position your light source.
For single light setups, a common light placement is at a 45 degree angle from the front of the subject because it illuminates most of your object while leaving enough shadow so that the lighting looks natural. For multiple light setups, a common light placement is two light sources at a 45 degree angle on either side of the subject. A single light setup gives off a more natural look with slight tonal variations in the background. A multiple light setup is more suitable if you want a clean white “cut-out” look.
4. Fill your shadows.
Pay attention to the shadow cast by your subject. If you want a softer shadow, you can either a) modify the light with a less translucent cloth or an additional diffuser like a skrim, or b) bounce the light with a piece of white foam core or an additional fill light. In general, the filler should be placed opposite the key lighting to bounce the light back onto the subject, thereby eliminating the shadow. We use a the TRP WORLDWIDE Magic Cloth Scrim to modify the light and the V-FLAT WORLD Foldable V-Flat to bounce the light, like the above.
Was this helpful?
Once you complete these four steps, it should be much easier to shoot consistent photos of your products. Here at The Denizen Co., we also offer product photography services for emerging entrepreneurs at our studio in New York City. Click here to learn more.